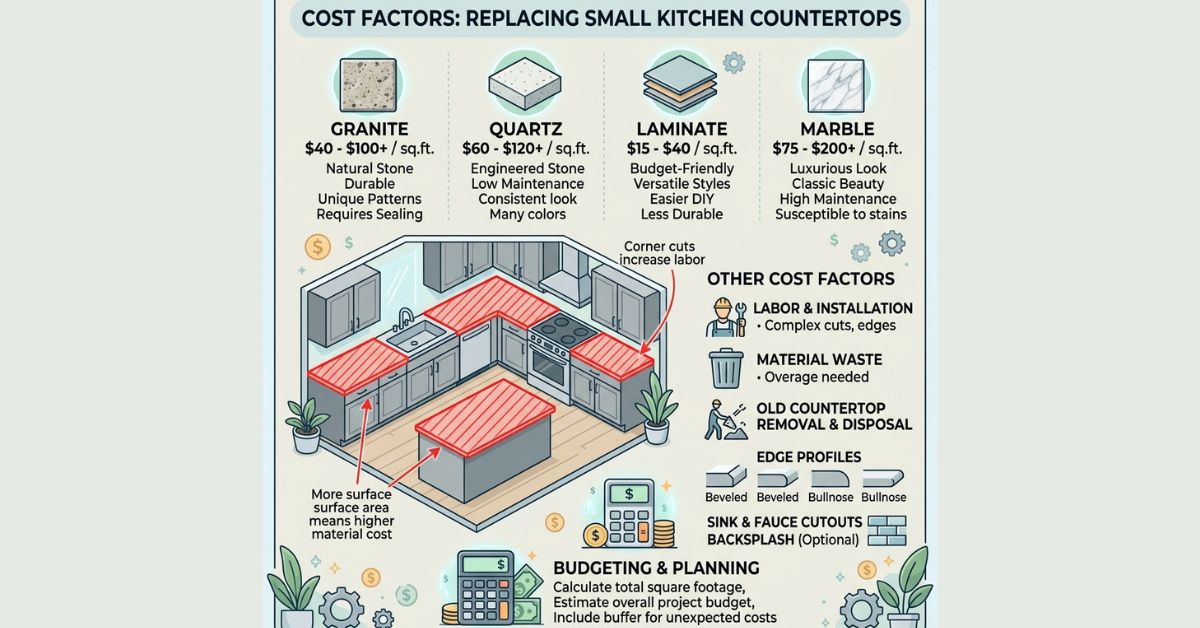
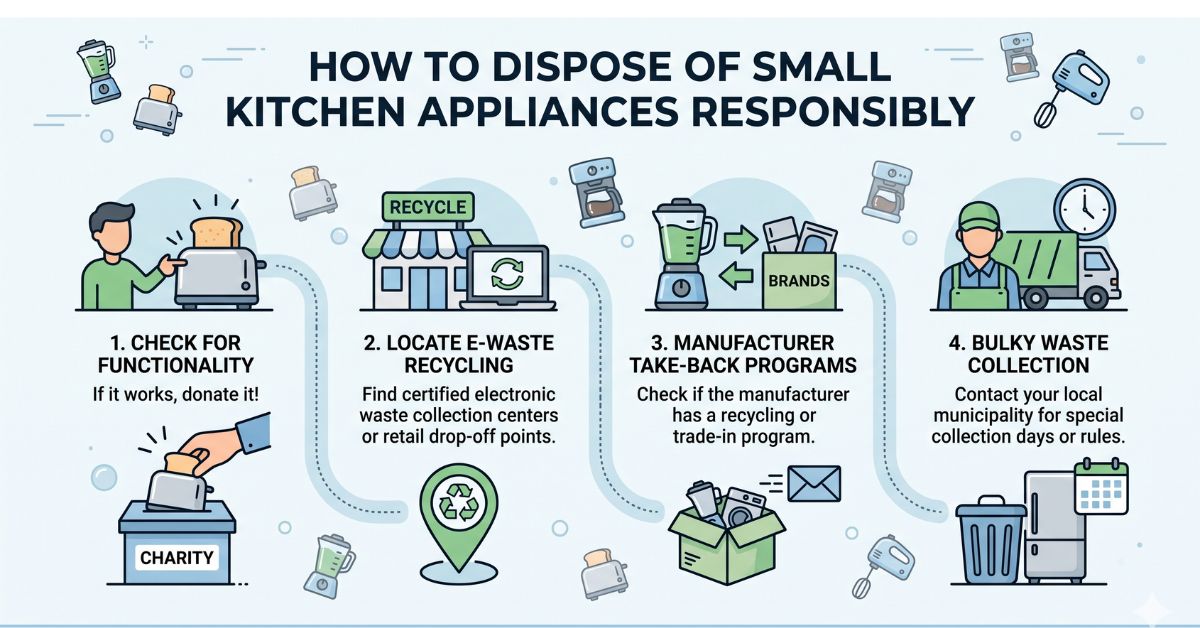
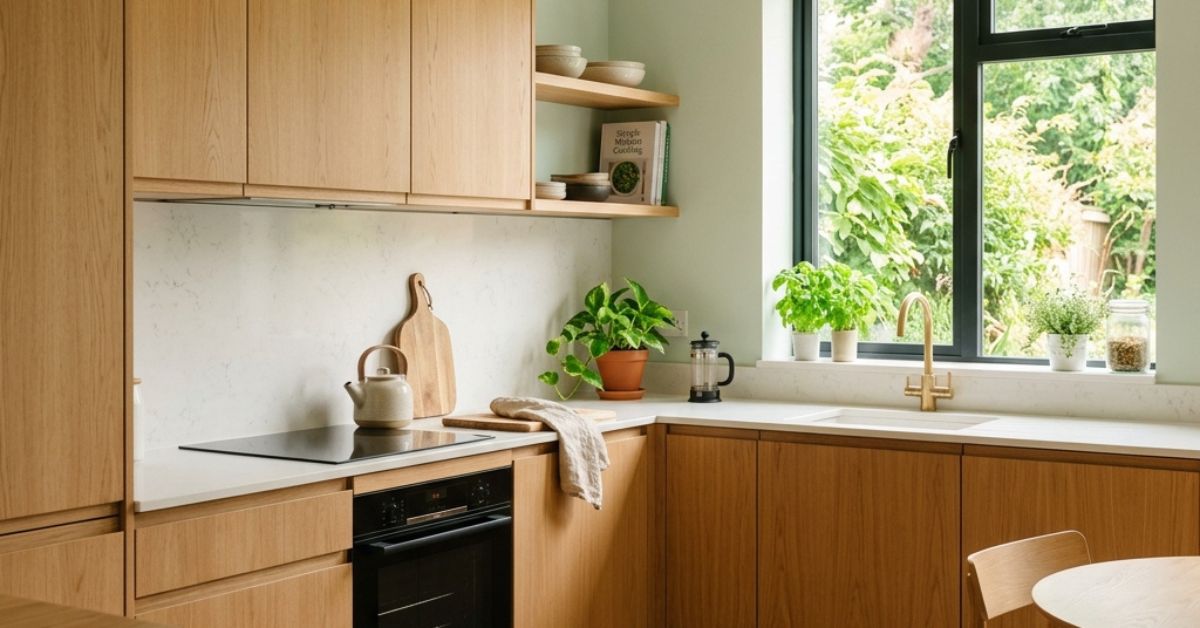
How to Build Kitchen Storage Shelves | DIY Guide for Strong & Stylish Storage

How to Build a Kitchen Pantry Storage Cabinet

Our editorial team individually chooses every product that is suggested on neatcupkit. We might get paid if you buy something after clicking on any of these links.

Ready to maximize your kitchen space? Discover the joy and practicality of custom kitchen shelves. This guide walks you through the process, providing strong and stylish storage solutions. From concept to completion, learn how to transform your kitchen with personalized shelving that fits your needs and reflects your style.

Introduction to Custom Kitchen Shelves

Benefits of Optimizing Kitchen Space

Optimizing your kitchen space with custom shelves can dramatically improve functionality. Thoughtfully placed shelves maximize every inch, transforming cluttered areas into organized havens. Declutter countertops and cabinets, making your kitchen more efficient and enjoyable. Custom shelves are a fantastic way to enhance storage and accessibility.

Why Choose DIY for Your Kitchen Shelves?

Choosing DIY for your kitchen shelves provides control and satisfaction. You become the architect of your storage. Enjoy the process of creating something unique and tailored. DIY projects are a rewarding experience that adds a personal touch to your home and offer the satisfaction of seeing your vision come to life.

Overview of the DIY Process

The DIY process involves careful planning, precise measuring, and accurate cutting. Learn how to assemble your shelves securely and install them with confidence. Step-by-step guidance ensures a successful outcome. From selecting the right materials to adding the finishing touches, this guide covers every aspect of building your own kitchen storage.

Why Build Your Own Kitchen Storage Shelves?

Building your own kitchen storage shelves offers numerous advantages. You can save money, customize to your exact needs, and enjoy the satisfaction of creating something yourself. DIY projects are a great way to personalize your home and improve functionality while learning new skills and enhancing your living space.

Cost Savings of DIY Shelves

Choosing to build your own shelves can lead to significant cost savings. For instance, painting the pantry the same color as your living space means you don’t need to buy extra paint. All the wood and MDF, plus screws and wood glue, can cost less than $200. The price of pre-made shelves can be much higher, making DIY an economical choice.

Customization for Your Unique Kitchen Needs

Opting to build your own kitchen shelves allows you to customize the size, materials, and finish to perfectly match your needs and kitchen design. You get to choose the materials. You get to choose the exact size. This level of customization ensures your shelves fit seamlessly into your kitchen, maximizing space and enhancing aesthetics.

Satisfaction from Building Your Own

There’s immense satisfaction in building your own pantry shelves. Imagine your pantry not only becoming more functional but also beautiful. After the shelves are done, organizing becomes a joy. This is when you really see your hard work paying off. The sense of accomplishment makes the entire project worthwhile.

How to Build Kitchen Storage Shelves (Step-by-Step Guide)

Step 1: Planning Your Kitchen Shelves

Planning is the first step in how to build kitchen storage shelves. Begin by assessing your pantry closet. Determine the ideal placement for your pantry shelves. Mirroring the previous layout while incorporating a custom, built-in aesthetic can be an excellent approach. Before you build anything, ensure your workspace is suitable and safe, considering both durability and your personal style when choosing wood and brackets.

Step 2: Measuring and Cutting Wood to Size

Precise measurements are crucial in how to build kitchen storage shelves. Use a tape measure to mark where to cut each piece of wood to size. Double-check your measurements before cutting with your saw. Cut 1×10 pine boards into 54″ pieces. Next, cut the 1-by-2 pine boards to length using a miter saw. Take great care when doing this so you do not waste material.

Step 3: Measuring and Cutting Wood to Size

Once your braces are in place, measure and cut your melamine board to size. Then, drill pocket holes in the long front and back wall boards. After assembling the shelves, cut the 3/4- and 1/4-inch plywood to size. It is extremely important that you get your measurements right the first time for all of this.

Step 4: Measuring and Cutting Wood to Size

Precise measurements are crucial in how to build kitchen storage shelves. Use a tape measure to mark where to cut each piece of wood to size. Double-check your measurements before cutting with your saw. Cut 1×10 pine boards into 54″ pieces. Next, cut the 1-by-2 pine boards to length using a miter saw. Take great care when doing this so you do not waste material.

Step 5: Measuring and Cutting Wood to Size

Once your braces are in place, measure and cut your melamine board to size. Then, drill pocket holes in the long front and back wall boards. After assembling the shelves, cut the 3/4- and 1/4-inch plywood to size. It is extremely important that you get your measurements right the first time for all of this.

Step 6: Assembling Your Shelves

Start assembling your shelves by creating the frame with 2x2s, cutting pieces for the cleating, support braces, and the shelf tops and bottoms. At this stage, don’t join everything together just yet; simply lay them out to visualize the final structure. Use wood glue to secure the support pieces together and consider pocket holes for extra strength.

Step 7: Assembling Your Shelves

To create a center support between the two shelves, notch out a 2 x 2 x 8 so that each shelf will rest on the notch. Lay a melamine board on each brace. Once dry, add cubbies and a half wall. Finish the edges near the walls with primed pine 1 x 2’s cut to size, gluing and nailing them into place for a professional touch.

Step 8: Installing Your Kitchen Storage Shelves

Installing your kitchen shelves involves several key steps to ensure stability and a professional finish. Start by drilling and securing cleats to the studs. These cleats act as support pieces, holding up the plywood placed on top. This method provides significant strength to the shelves, allowing them to hold a considerable amount of weight. Be sure to keep using a level.

Step 9: Installing Your Kitchen Storage Shelves

With spots marked for all shelves, attach metal brackets to the studs. Pre-drill pilot holes at the marked bracket locations on the wall for easier screw installation. Use 2.5″ cabinet screws to securely anchor the brackets to the wall. Continuously use a level to ensure the brackets remain even as you screw them in place.

Step 10: Installing Your Kitchen Storage Shelves

To attach the shelves, place a board on top of a set of brackets, ensuring it’s centered and using a level. Use 0.75″ wood screws to attach the shelf to the brackets, drilling from the underside through the holes in the brackets and into the wood board. To install the wall braces, locate wall studs and mark their locations. Cut your 1 x 2’s to size.

Step 11: Installing Your Kitchen Storage Shelves

Spread wood glue on the side of the brace touching the wall, lining up the top edge with your markings. Use a level to position the brace and nail it in place to hold it. Predrill holes into the brace at the stud locations and screw in 2 1/2 inch screws. For vertical panels near the fridge, screw them into wall studs for stability.

Best Places to Install Kitchen Shelves

Utilizing Walls for Storage Solutions

Installing open kitchen shelves is a home improvement project that can add visual interest and maximize vertical space in a small kitchen. To achieve a sleek and uniform look, use polyurethane to seal the wood. This will not only protect the wood from moisture and wear but also give the shelves a polished and professional finish.

Creating Space in Your Pantry

Many pantry closets have wire shelving. The ultimate goal? Build floating shelves. The pantry makeover was a desperate attempt to change the new pantry. In the step-by-step tutorial you will learn how to build.

Creating Space in Your Pantry

Often, a simple pantry can become a key feature with the right pantry design and wood pantry shelves. Focus on kitchen organization to make the pantry more efficient and user-friendly. Consider installing DIY pantry shelves to further customize and optimize the pantry space. The number of shelves you need depends on your storage requirements.

Maximizing Corners with Corner Shelves

Consider exploring DIY corner closet shelves for a more customized approach. Secure the shelves using appropriate brackets and wood screws, ensuring they are level and stable. With the right brackets and wood screws, learn how to build corner shelves and transform awkward corners into functional storage areas that add both practicality and visual appeal to your kitchen.

When working with wood, always sand the surfaces for a smooth finish before applying any polyurethane or paint. This will enhance the look and feel of your DIY project. Remember, patience and precision are key to achieving professional-looking results in your DIY projects.

Choosing the Right Materials and Tools for Durable Shelves

Wood Types for Kitchen Shelves

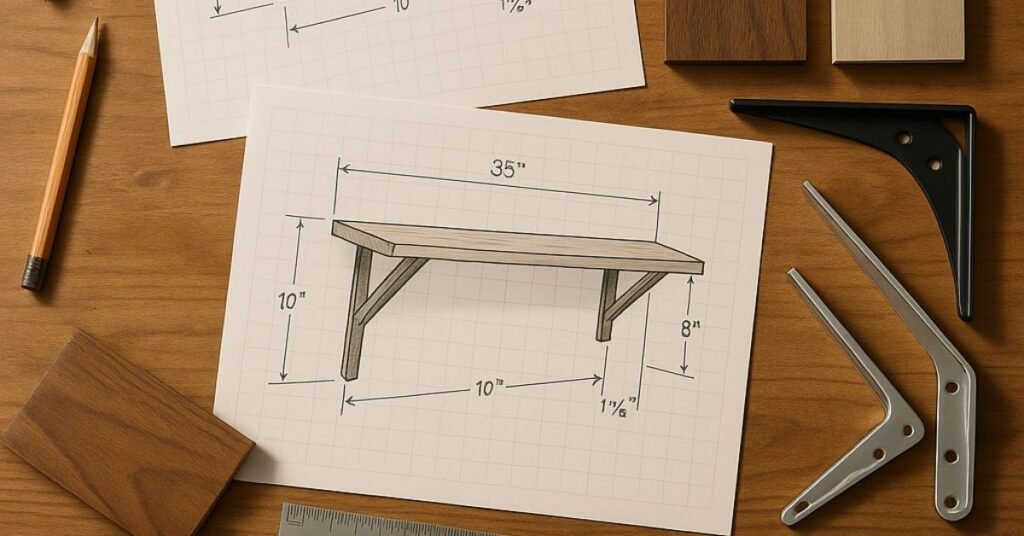
Selecting the right wood is critical when considering how to build kitchen storage shelves. Popular choices include plywood, pine boards, oak, maple, cherry, and walnut. When we started this project we used 2x2s for the frame, cutting pieces for the cleating, support braces, and the shelf tops and bottoms. You might even consider MDF sheets coupled with pine boards.


For supplies, you’ll want to have the following lumber and plywood:

Material

Details

2 x 2 Lumber


Plywood (for shelves)

Top: ¾” plywood, Bottom: ¼” plywood or Hardboard

Additional needs might include 1 x 3 pine boards for the shelf face. Other home improvement supplies to have are a level, stud finder, drill, Kreg Jig and screws, miter saw, wood glue, Liquid Nails, clamps, nail gun, caulk, wood filler, primer, and paint.


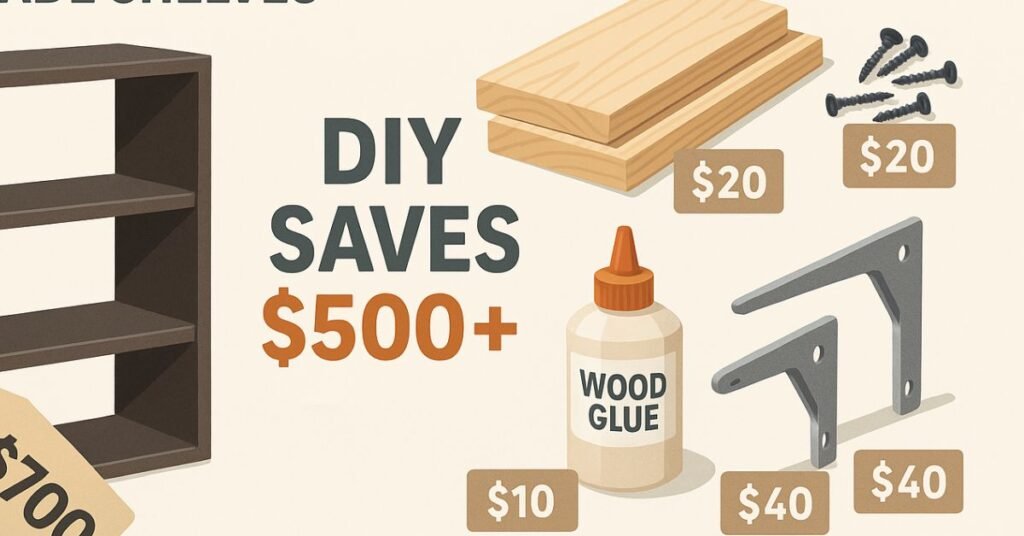
For your shelving project, consider the following materials. You’ll need fasteners such as 1 1/4-inch coarse-thread pocket hole screws, 18-gauge finish nails (1 1/4-inch), and 2-inch deck screws. Additionally, stain, polyurethane, wood filler, and wood glue are recommended. The dimensions of the boards for shelves are detailed below:

Board Type

Dimensions

Shelf Frames

1-by-2-by-8-foot

Cap Front Edges

1-by-3-by-8-foot

Shelf Bottoms

1/4-inch-by-4-foot-by-8-foot plywood

Shelf Tops

3/4-inch-by-4-foot-by-8-foot plywood

Essential Tools and Safety Gear

To build DIY kitchen shelves effectively, it’s important to have the right tools. Some of these are listed below:

Essential Tools

Helpful Tools

  • 4-foot level
  • Clamps
  • Drill/driver
  • Miter saw
  • Pneumatic nail gun
  • Pocket hole jig
  • Sandpaper
  • Stud finder
  • Table saw or circular saw with a straightedge guide


Always prioritize safety by wearing safety goggles and gloves, and consider a long level for accurate alignment. Other important home improvement items to include are drill bits for pilot holes, wood screws, and cabinet screws. You might also want optional wood stain, paint, polyurethane, and a paintbrush or rags for finishing.

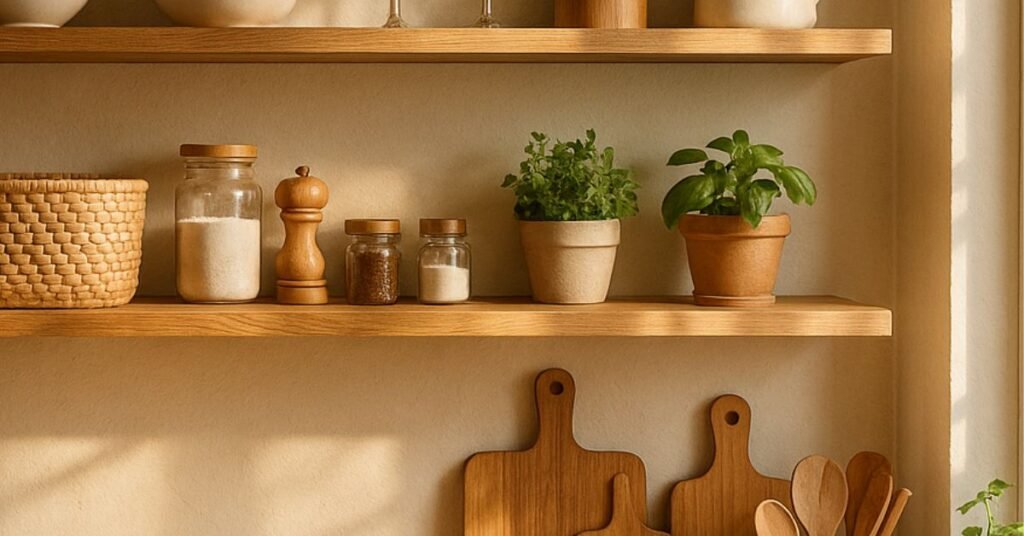
Remember to always learn how to build corner pantry shelves. Remember to learn how to build using stud finders. Using a level ensures brackets are even, so the shelves don’t appear unleveled. Utilizing scrap pieces of materials gives a cleaner finish. Using the correct tools and safety gear will help ensure the project goes as smoothly as possible.

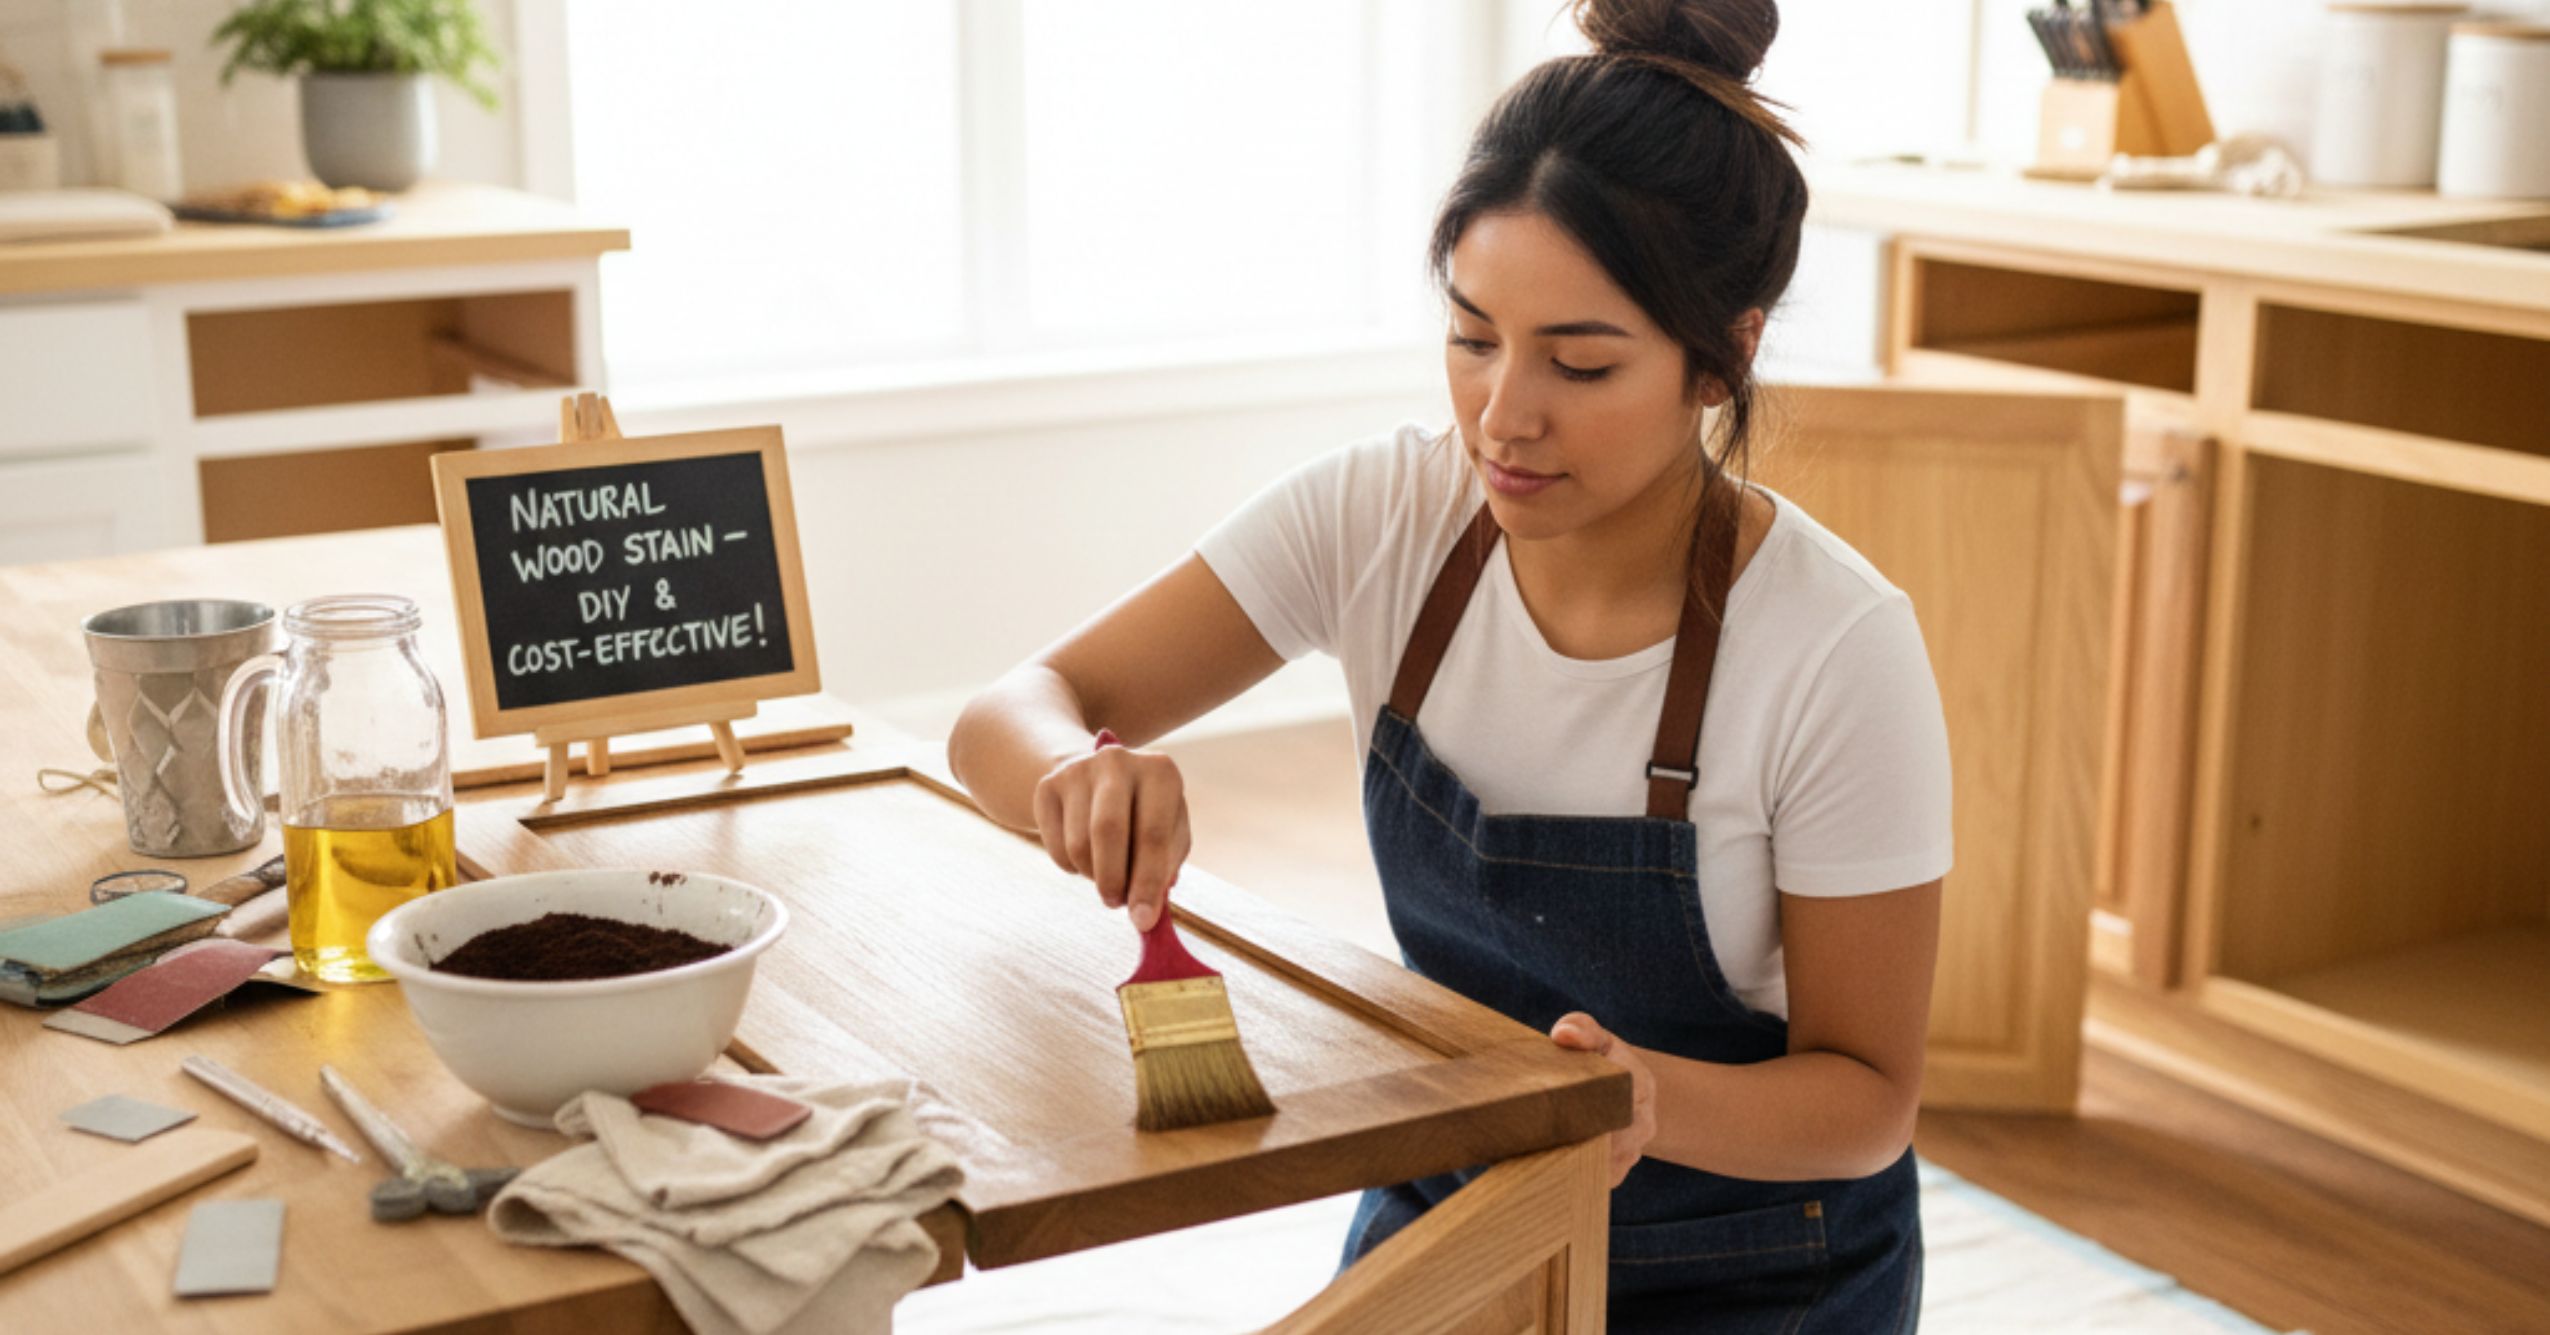
Finishing Options: Paint and Sanding
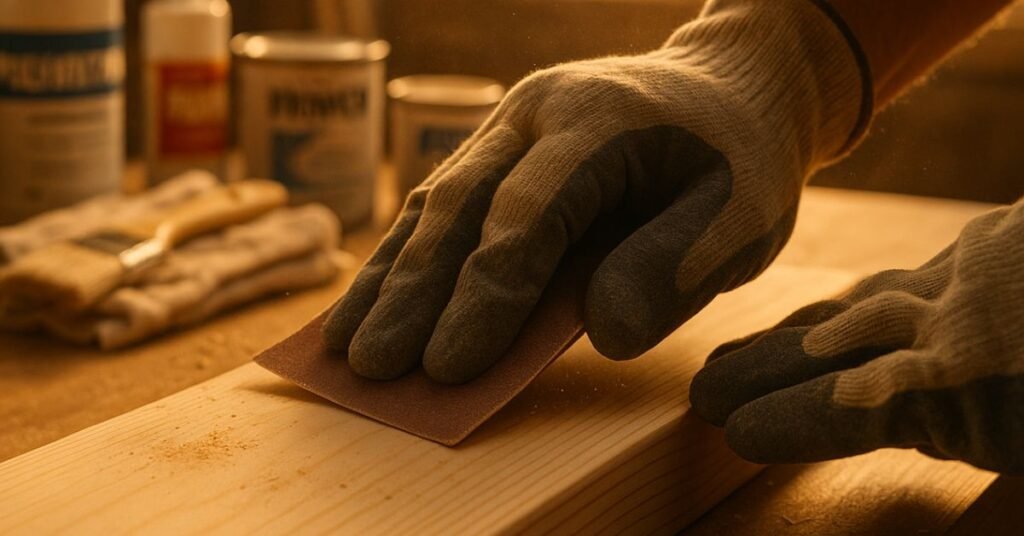
Finishing DIY kitchen shelves involves sanding, painting, and sealing. Apply wood filler to nail holes or gaps, then caulk where the shelves meet the wall. Prime and paint everything for a uniform look. If you’d like to apply stain or paint to elevate the look of your shelves, sanding the boards will also help prepare them for this step-by-step guide.

Smoothing edges with sandpaper prevents splinters and enhances the shelf’s appearance. Sanding prepares the boards for stain or paint. To sand properly, ensure that you wipe away any dust. This will make the finish of the shelf as smooth as possible. Next, brush two coats of polyurethane across everything to help seal it and protect the wood.

Consider whether to stain or paint, applying thin coats with a brush or rag. Finally, caulk holes and edges, matching paint to the shelf. This helps create a more uniform appearance and ensures the project looks as professional as possible. Making sure to caulk all the holes and edges or any gaps will result in a more beautiful finish.

Conclusion: Start Your DIY Journey

Recap of Benefits

Throughout this tutorial, we’ve highlighted numerous benefits of DIY kitchen shelves. You’ve saved money, customized to your exact needs, and enjoyed the satisfaction of creating something unique for your home. DIY allows personalization, efficient space utilization, and the pride of accomplishment. You are able to maximize kitchen organization to make the pantry more efficient and user-friendly.

Encouragement to Begin Your Project

With the right tools and materials, transforming your kitchen storage is within reach. Gather your supplies, follow the step-by-step guide, and start building. Don’t hesitate to adjust the plans to fit your specific needs and preferences. Building your own kitchen shelves will be a satisfying and rewarding experience.

Links to Other DIY Storage Ideas

If you liked this project, there are plenty of other DIY storage solutions to explore. You could consider DIY corner closet shelves for other rooms in your home. This will help maximize all your home improvement options. You might also think about building your own floating shelves to continue to optimize space. Be sure to search the web to find new and engaging options to expand the home improvement horizons.

Your Questions, Answered

What type of wood is best for kitchen shelves?

The best type of wood for kitchen shelves depends on your budget, style, and needs. Plywood is economical and strong, while pine boards offer a classic look. Hardwoods like oak, maple, and cherry are durable and beautiful but more expensive. MDF is a good option if you are looking to paint the shelves since it will give it a smooth uniform appearance.

Yes, you can install kitchen shelves without drilling into walls, but it requires alternative methods. Consider using heavy-duty adhesive brackets or tension rods for lighter items. Freestanding shelving units are also a great option. However, these methods may not support as much weight as shelves anchored to studs, so be sure to choose the method that will ensure your safety.

The weight capacity of DIY kitchen shelves depends on factors like material, brackets, and installation method. Shelves anchored to wall studs can typically hold more weight than those anchored only to drywall. Always test your shelves with progressively heavier items to ensure they can safely bear the load.

While hand tools can be used, power tools significantly simplify and speed up the process of building kitchen shelves. A power drill, miter saw, and sander are particularly useful. Power tools will help you cut wood to size more effectively. Power tools help you more efficiently build high quality DIY kitchen shelves.

To achieve a professional look, pay attention to detail. Sand surfaces, use wood filler for imperfections, and apply even coats of paint or stain. Ensure shelves are level and hardware is concealed. Choose colors and materials that complement your existing kitchen design. Remember to also maintain balance between shelves to create a more cohesive look.

Meta Title: DIY Kitchen Shelves: Build Strong & Stylish Storage | Step-by-Step Guide Meta Description: Learn how to build kitchen storage shelves with our step-by-step tutorial. Maximize your space and add style with custom DIY pantry shelves.

Leave a Reply

Your email address will not be published. Required fields are marked *