Our editorial team individually chooses every product for kitchen storage that is suggested on neatcupkit. We might get paid if you buy something after clicking on any of these links.
To organize pantry shelves effectively, start by emptying and decluttering, then group food into zones—snacks, baking, canned goods, and spices. Use clear bins, lazy Susans, and tiered risers to maximize every inch. Label everything, and your pantry stays functional for weeks. Explore more pantry storage essentials from Amazon Storefront.
You open the pantry to grab pasta, and a can of soup rolls off the shelf. Sound familiar? A disorganized pantry doesn’t just look messy—it costs you money, wastes food, and adds unnecessary stress to your daily routine. The good news? Learning how to organize pantry shelves doesn’t require a full weekend or a big budget.
This guide walks you through everything: the real benefits of an organized pantry, a step-by-step process to get there, the best storage solutions for every shelf type, and a zone-by-zone breakdown so every item has a home. Whether you’re working with a walk-in pantry, a narrow cabinet, or a deep storage closet, these strategies work.
Why Bother? The Real Benefits of an Organized Pantry
Before diving into the how, let’s talk about the why—because the payoff is bigger than you might think.
Save money at the grocery store. When your pantry shelves are cluttered, you can’t see what you have. You buy another jar of peanut butter, not realizing you already have two. A clear, well-organized pantry means you shop smarter and buy only what you need.
Cut down on food waste. Expired cans and forgotten bags of flour quietly drain your budget. Organized pantry shelves make it easy to spot what needs to be used first—and nothing gets buried and wasted.
Save time every day. Cooking is faster when you can find cereal, spices, and dry goods without digging through boxes. A few minutes of upfront effort saves hours across a year.
Reduce daily stress. A tidy pantry is one less thing to think about. It makes meal planning easier, grocery runs shorter, and mornings calmer.
How to Organize Pantry Shelves: A Step-by-Step Guide
Step 1: Empty the Pantry Completely
Pull everything off the shelves. Yes, everything. This gives you a clean slate and forces you to see what you actually have.
Wipe down each shelf while it’s empty. A quick clean before reorganizing makes the whole system feel fresh.
Step 2: Sort and Declutter
Check every item’s expiration date. Toss anything expired, stale, or that your household hasn’t touched in six months.
Group what remains into rough categories: canned goods, dry goods (pasta, rice, beans, flour), snacks, baking supplies, spices, sauces, and cooking oils. This makes the next steps much easier.
Step 3: Assign Each Item a Zone
Think of your pantry shelves in terms of frequency and reach. Items you use every day should sit at eye level. Heavy items like large bottles of vinegar or soup cans belong on lower shelves. Rarely used items (holiday baking supplies, bulk extras) go on the top shelf.
This “zones” approach—grouping items by type and access frequency—is the foundation of every well-organized pantry.
Step 4: Add Storage Solutions
Once you know what you have and where it should live, bring in the right tools. More on this in the next section.
Step 5: Label Everything
Labels aren’t just aesthetic—they’re functional. Clear labels tell every household member where things live and where to return them. Use a label maker, chalkboard labels, or even masking tape and a marker.
Step 6: Maintain It
Spend five minutes every two weeks doing a quick tidy. Rotate new groceries behind older stock (first in, first out). This simple habit prevents the cycle of chaos from restarting.
Best Storage Solutions for Pantry Shelves
Clear Bins and Containers
Clear bins are one of the most effective tools for organizing pantry shelves. They let you see exactly what’s inside without pulling anything out. Use them for snack pouches, granola bars, small sauce packets, or anything that tends to scatter. Explore more Pantry & Closet Storage Bins essentials from Amazon Storefront.
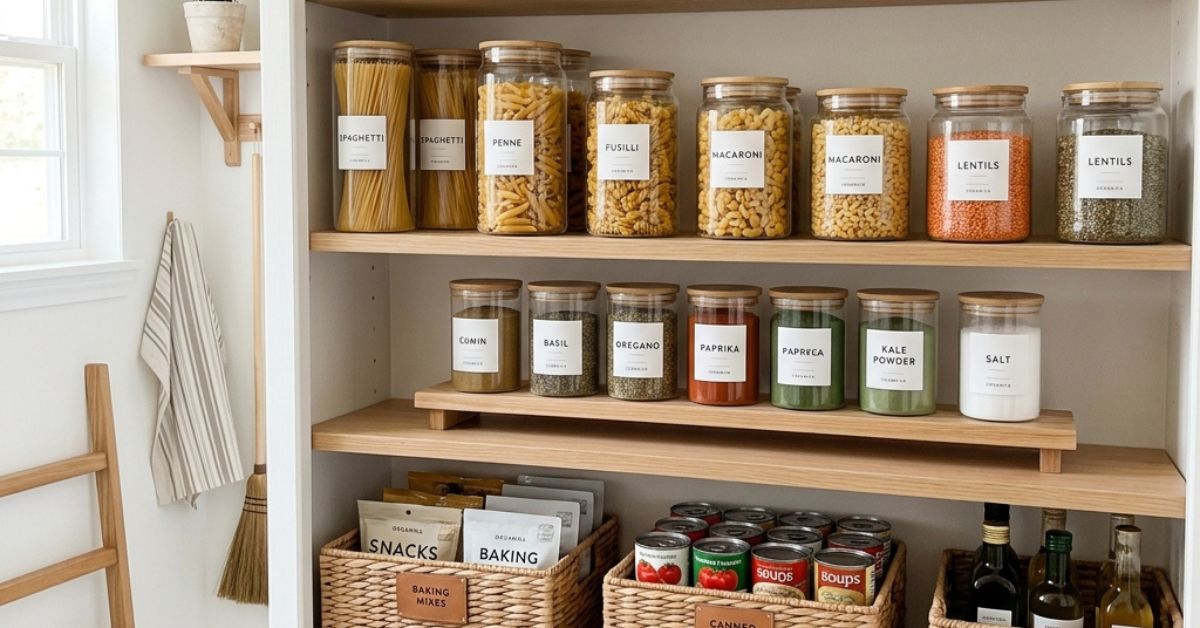
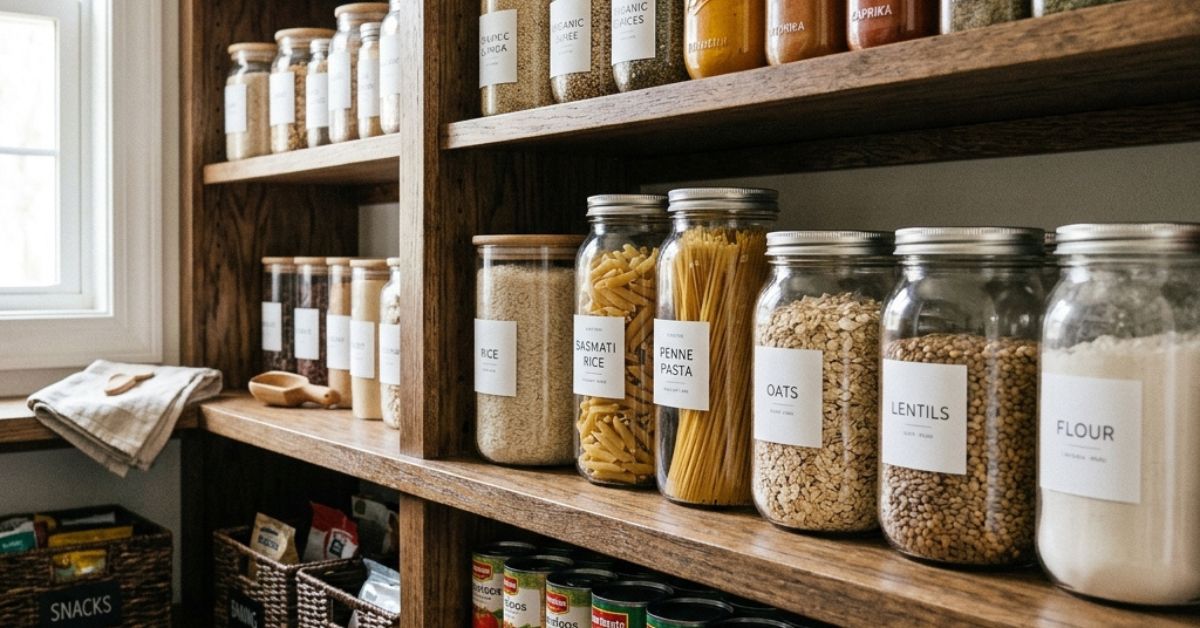
Clear airtight containers work especially well for dry goods like flour, pasta, rice, and cereal. They keep food fresher longer and make deep pantry shelves far easier to navigate.
Lazy Susans
A lazy Susan—a rotating turntable—is ideal for corner shelves or deep cabinets where items at the back get lost. Place spice jars, condiment bottles, or small cans on a lazy Susan so everything rotates into reach. No more forgotten items hiding at the back of the shelf.
Tiered Risers
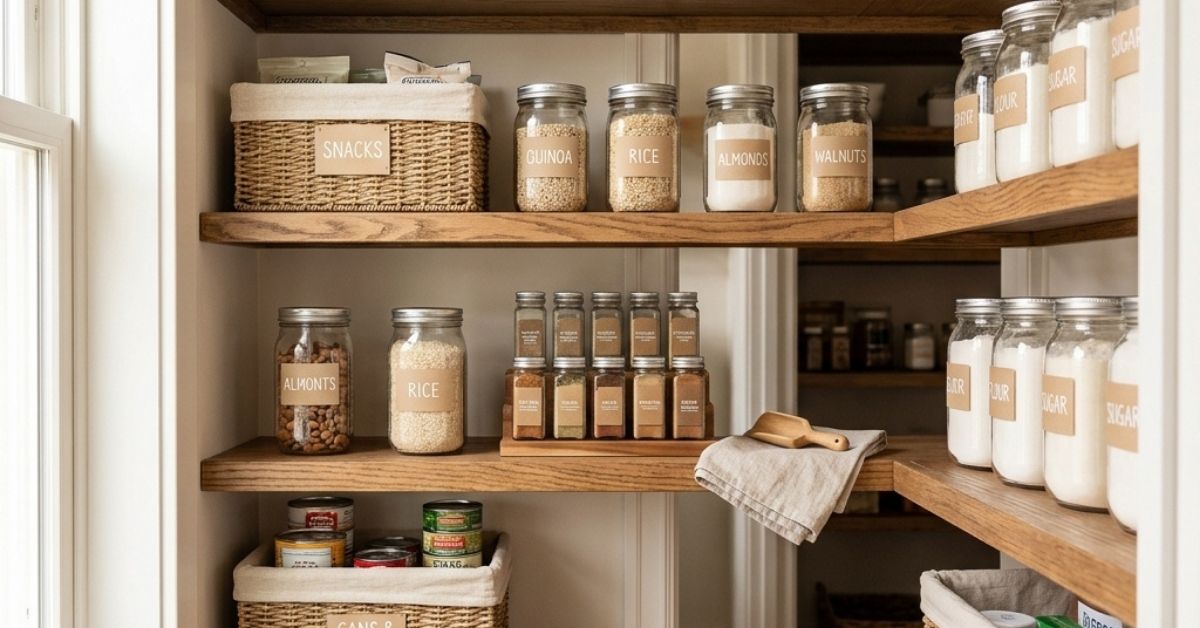
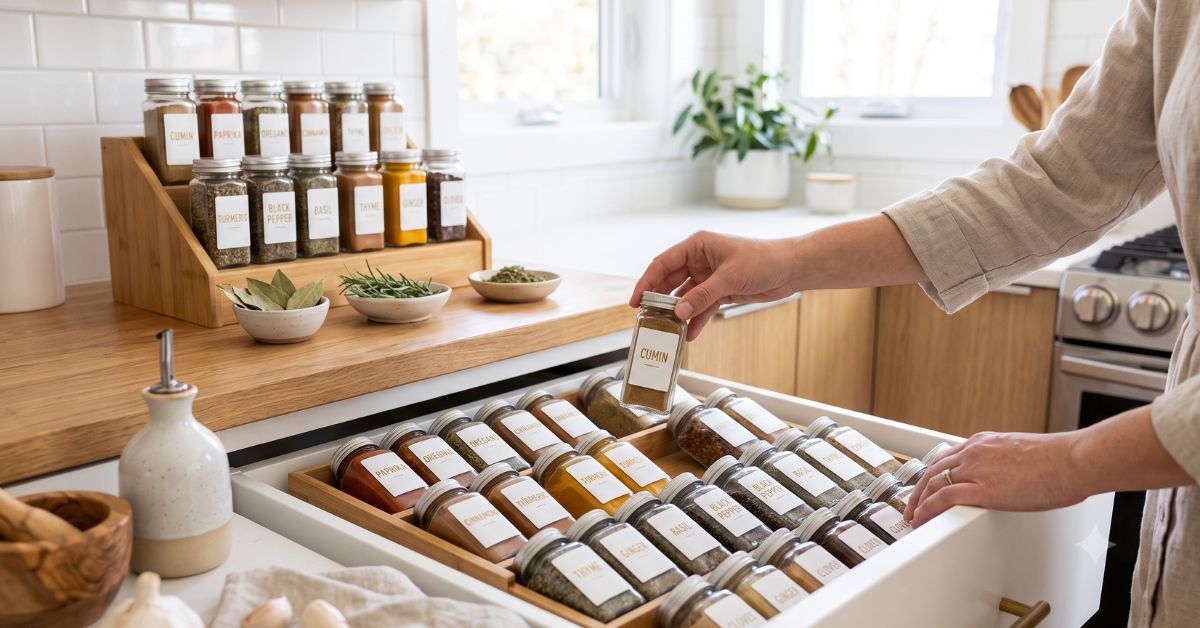
Tiered shelf risers create multiple levels within a single pantry shelf. They’re perfect for spices, canned goods, or small jars where you need to see every item at once. Without a riser, things in the back disappear. With one, every label faces forward.
Baskets
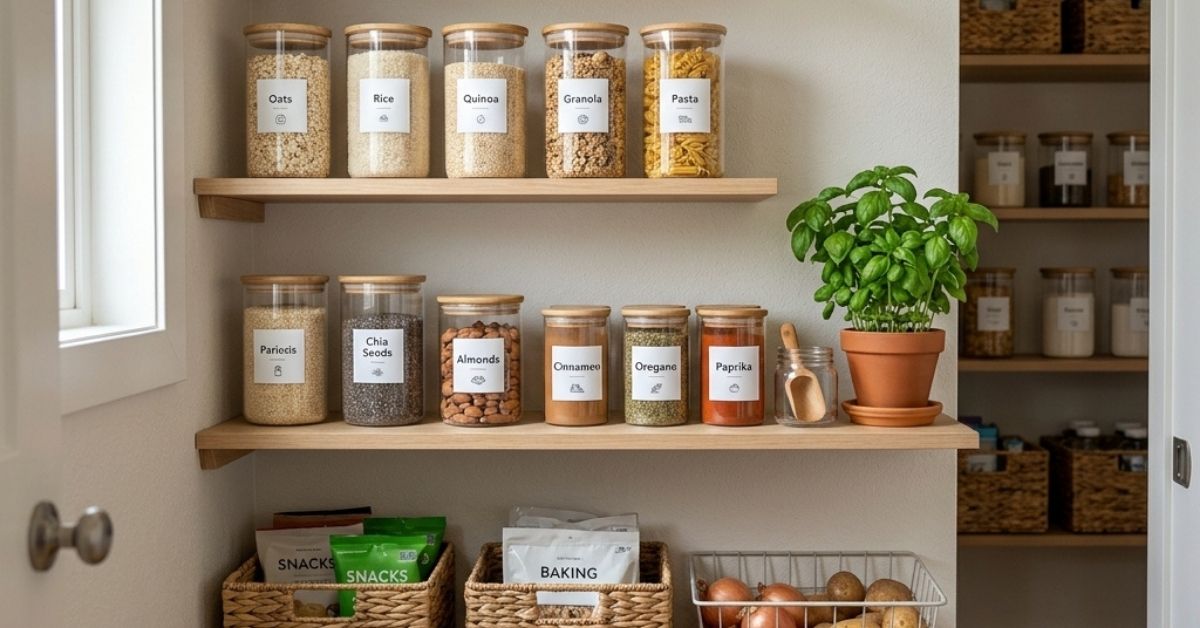
Baskets add warmth to pantry shelves and work well for grouping similar items—think a dedicated snack basket for the kids or a baking basket with powder, cocoa, and vanilla extract. Choose baskets with open fronts or handles so items are easy to grab.
Adjustable Wire Shelving
If you’re setting up a walk-in pantry from scratch, adjustable wire shelving for pantry spaces offers the most flexibility. You can shift shelf heights as your storage needs change—especially useful if you tend to stock up on bulk items or tall bottles.
Zone-by-Zone Organization: What Goes Where
Baking Zone
Group all baking supplies together: flour, sugar, baking powder, cocoa, vanilla, and similar items. Store them in clear containers so you can see quantities at a glance. A dedicated basket or deep bin keeps the zone contained and easy to grab when you’re ready to bake.
Snack Zone
Place snacks at a height that works for your household. Families with kids often place the snack zone on a lower shelf for easy access. Use a clear bin or basket to corral individual snack bags, granola bars, and crackers. When the bin is empty, it’s time to restock—simple as that.
Canned Goods Zone
Canned goods are heavy and stackable, so they belong on lower shelves. Use tiered can risers so every label faces forward. Organize by type: soups, beans, sauces, and vegetables each in their own row. Rotate new cans to the back so older stock gets used first.
Spice Zone
Spices deserve their own dedicated shelf or section. A tiered riser or small lazy Susan works perfectly here. Alphabetizing your spices sounds excessive until you’re mid-recipe and can’t find cumin. It takes two minutes to set up and saves time every single time you cook.
Dry Goods Zone
Pasta, rice, beans, oats, and similar dry goods store best in airtight containers. Not only does this keep food fresh longer, but uniform containers also stack neatly and make your pantry shelves look cohesive. Label each container clearly, including the expiration date if you’re transferring from original packaging.
The Right Pantry, Every Time
An organized pantry isn’t a luxury—it’s a practical system that saves money, reduces waste, and makes daily cooking easier. The key is starting with a clear plan: declutter first, assign zones, then bring in the right storage tools to make each zone work.
You don’t need to do it all at once. Start with one shelf or one zone. Clear bins and a lazy Susan can transform a single shelf in under 30 minutes. Build from there, and the whole pantry follows.
The goal isn’t perfection—it’s a system that works for your household and stays manageable over time. Once you find that rhythm, keeping your pantry organized becomes second nature.
Deep pantry shelves are the hardest to keep tidy because items at the back get forgotten. Use a lazy Susan to bring back items into reach with a simple spin. For narrow shelves, choose tall, slim containers and stack vertically. Tiered risers also help by creating front-to-back visibility on a single shelf level.
What is the best way to categorize food in a pantry?
Group food by how you use it, not just by type. Common categories include baking supplies, snacks, canned goods, dry goods, spices, sauces, and cooking oils. Place frequently used categories at eye level and less-used items higher up or toward the back. This makes cooking faster and grocery shopping more efficient.
Should I take dry food out of its original packaging?
For many dry goods—flour, sugar, pasta, rice, cereal, and beans—transferring to clear airtight containers keeps food fresher and makes pantry shelves look uniform and tidy. Always write the expiration date on the container or keep the label. For items you go through quickly, staying in the original packaging is perfectly fine.
How often should I declutter and clean my pantry shelves?
A quick tidy every two weeks takes about five minutes and prevents clutter from building up. Do a full declutter—checking expiration dates, wiping shelves, and resetting zones—every three to six months. Align this with seasonal grocery shopping patterns or before a big cook-up.
What items should never be stored on open pantry shelves?
Avoid storing items that degrade in light, heat, or humidity on open shelves near heat sources. Cooking oils, for example, go rancid faster near the stove. Medications, cleaning products, and anything toxic should never share pantry space with food. Items that attract pests—open bags of flour or sugar—should always be in sealed containers.





2 Responses